Monday, September 23, 2013

Cherry Bomb Pepper Hot Sauce and Why Siouxsie Sioux is My Spirit Animal.


I bought a big bunch of cherry bomb peppers at the farmer's market last weekend mostly because their name reminded me of the 1976 hit Cherry Bomb, by The RunawaysI have a special place in my heart for punk rock, especially the early stuff. Despite all evidence to the contrary (I think I probably come off as pretty straight laced), there will always be a deep part of me that craves some level of civil disobedience mixed with mutual-aid and unfettered self-expression. Basically, Siouxsie Sioux is my spirit animal.

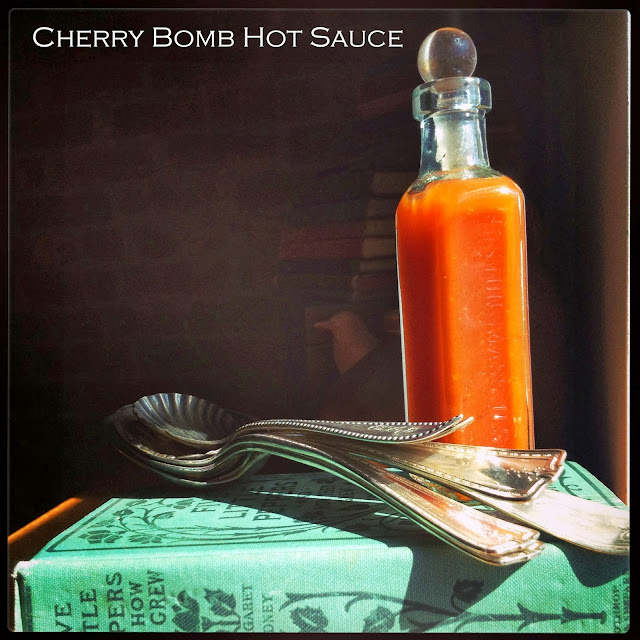
This cherry bomb hot sauce is absolutely loaded with flavor and is definitely as close to punk as a hot sauce can get (save that it's not fermented...and that I just said that). It reminds me of a mix between Cholula and Sriracha and it's great over anything that can benefit from a kick of heat. I think it would also be amazing in a Bloody Mary, but you'll have to test that theory out for me:-). Please note that this recipe will work with any hot pepper, the heat level will just vary.


Cherry Bomb Hot Sauce
1 lb cherry bomb peppers (despite the name, these are actually only medium hot)
1 1/3 cups distilled white vinegar 
1 tablespoon salt
2 chipotle peppers, roughly chopped (optional)
4 cloves garlic, smashed

First, stem the peppers.


Then combine all the ingredients in a food processor and puree until smooth.


Force the puree through a sieve to remove the pepper seeds and then pour the hot sauce into a mason jar or something similar. I ended up with about a cup and a half of hot sauce from this recipe.

Thursday, September 19, 2013

Royal Spiced Cupcakes (Gluten Free) for National Cupcake Week & the 10 Most Expensive Desserts in the World!

Happy National Cupcake Week y'all!
I decided to make this decadent looking cupcake after reading an article about the 10 Most Expensive Desserts in the World on the Priority One Jets website. Click on the article, it's astounding. 

One of the featured desserts, served up at the restaurant Serendipity right here in NYC, is an ice cream sundae shrouded in 24 carat gold leaf, served in a crystal goblet with a golden spoon. Oh, and don't forget the caviar, which they use in place of a cherry. So much for dipping potato chips in your Häagen-Dazs for that salty-sweet fix. 

The most expensive dessert the article features is a simple bowl of marinated strawberries over vanilla ice cream garnished with an antique diamond ring worth $3.95 million smackers! It's sold at Arnaud’s in New Orleans where, apparently, it really is all about the Benjamins. For comparison's sake, according to Wikipedia the GDP of Germany last year was $3.6 million. You go, Arnaud's!

I never buy cupcakes when I'm out-and-about because they often don't have any particular flavor I can discern. They just taste sweet, or else they're so rich that they just taste sweet and fatty. Lucky for you (and me!), these perfectly moist, tender, fluffy, gluten-free cupcakes are off the charts both in aspect and flavor but they are as affordable as can be. Plus the icing is made with bourbon vanilla, so there's a nice spiked flavor to accompany the warmth of the cinnamon and cardamom. 

This recipe is adapted from one I found at the excellent blog, Gluten-Free Goddess. I will definitely be using her site as my gluten-free jumping off point from now on because these came out marvelous!
Adapted from Gluten-Free Goddess, Gluten-Free Vanilla Cupcakes with Mocha Icing
Yield: 48 mini cupcakes
Wet
1 cup brown rice flour 
1 cup tapioca starch 
1/2 teaspoon table salt 
1 teaspoon baking powder 
1 teaspoon baking soda 
1 teaspoon xanthan gum 
3/4 cup sugar 
1/2 teaspoon cardamom
1/2 teaspoon cinnamon
Dry
1 cup coconut milk 
1 large egg
3 Tablespoons vegetable oil or melted coconut oil
1 Tablespoon vanilla extract 
1 Tablespoon freshly squeezed orange juice 

Preheat your oven to 350ºF.  Prep two mini-cupcake tins with liners. I used silver and gold for a more royal feeling!

Whisk the dry ingredients together in a bowl and set aside. In a separate bowl, whisk the wet ingredients together. Combine the wet and dry gently with a spoon or spatula until just combined.
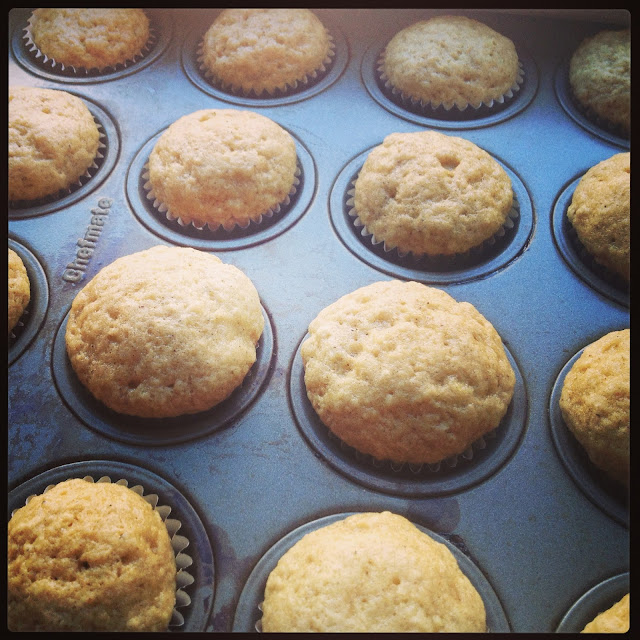
Fill the liners about 1/2 full (I overfilled mine, as you can see in these photos) and bake on the center rack of your preheated oven until firm. About 10 minutes. If you decide to make regular sized cupcakes, check for firmness at 14 minutes.


Allow the cupcakes to set-up and cool the pan briefly, then finish cooling them on a rack. 


While they're cooling, mix a batch of icing. Be sure to add the liquid slowly so you don't end up with runny icing.


Quick Icing
1 1/2 cup confectioner's sugar, sifted
1 Tablespoon bourbon vanilla extract (use lemon juice for a more tangy flavor)
2 Tablespoons coconut milk or any liquid (add in small increments just until the icing is glossy and viscous like very thick molasses).

Once the cupcakes are fully cool, use a serrated blade to saw off the tops so they are very flat (see uses for the cupcake tops below). Top each with icing starting in the center and pushing out toward the edges. Decorate with whatever you have on hand, lemon or orange zest and/or a pinch of sugar would look beautiful if you don't have sprinkles or sugar pearls. 


As for the cupcake tops, don't toss 'em, instead, break them up and eat them with some whipped cream OR crumble them up very finely and store them in a baggie or tupperware in the freezer for later use sprinkled over ice cream, patted over icing for an elegant finish to your next cake project, or smushed and rolled up to form cake pops!

If you prefer to try to simulate one of the actual 10 Most Expensive Desserts in the World, try this recipe for Decadence D'or Inspired Cupcake courtesy of, Priority One Jets. Click on either link for a photo of the original.


Tuesday, September 17, 2013

Small Batch Pickled Okra with Indian Spices in Honeyed Vinegar

After a recent trip to our local farmer's market, the Columbia Greenmarket, I came home with a small bounty of one of my Nashvillian husband's favorite vegetables. Okra! 

I decided to make a small batch of pickles with them and I'm thrilled with the results. After brining in their solution for one week, these okra pickles are subtile (i.e not too vinegary) yet extremely flavorfulAnother bonus, somehow the pickling process produces okra that's perfectly crisp/tender and not at all slimy! Woo hoo!

I used a pickling solution I found at The Gastronomic Gardener. It's a really wonderful solution because it's not too vinegary, so you can still taste the flavor of the thing you are pickling above the acidity. I definitely plan to use it again for other veggies.

One final tip, you can use this solution to make a mixed batch of pickles with pretty much whatever veggies you have on hand. Also, if you don't want to bother with the hot water process, just pour the solution and whatever spices/flavorings you like over your veggies, let everything cool and then refrigerate. Just be sure to eat these quick-refrigerator pickles within a week or two because they aren't hermetically sealed/sanitized. 

Honeyed Vinegar Pickling Solution 
Recipe adapted from The Gastronomic Gardener
Yields approximately 4 pints 
3 cups distilled vinegar 
1 1/3 cups water
1/3 cup honey
2 teaspoons kosher salt

Prepare the honeyed vinegar pickling solution by bringing all the ingredients to a boil, then cutting off the heat. Ideally everything will range from hot to room temp as you move through these steps so there are no major temperature shifts that might cause your glass jars to shatter.

Okra Pickles with Indian Spices in Honeyed Vinegar
Yield 4 pints
about 40 okra (8-12 or so per pint jar)=about 2 lbs 
4 Tablespoons vegetable oil
Tablespoon mustard seeds
Tablespoon nigella seeds
2 teaspoons fenugreek seeds
1 teaspoon turmeric powder, divided
4 inch piece of ginger, sliced thinly (about 4 scant Tablespoons)
*Enough honeyed pickling solution to cover the okra leaving 1/4 inch of headspace.

Rinse the okra and drain it on a clean cloth.

Bring enough water to a boil to cover the size caning jars you are using by at least 1/2 inch. Drop in the jars you're using, uncovered, and let them scald for 10 minutes to sanitize. Drain and set aside on a clean cloth.

Heat a tablespoon on neutral vegetable oil in a small frying pan until it's hot but not smoking. Add all the seeds (but not the turmeric ) and fry until fragrant. About 30-40 seconds. Use a sputter guard as the mustard seeds will pop and shoot out of the pan. Ouch!

Slide as many okra as can fit, varying them top to tail, into your pint jars. Note: When purchasing the okra, try to pick ones that are relatively similar in size so they'll fit somewhat uniformly.

To each jar of okra, add 1/4 teaspoon on turmeric, a scant Tablespoon of ginger, and about a quarter of the fried seeds in oil. Don't go nuts, just try to get these things somewhat evenly distributed between the four pints.


Cover the okra with brine so there is 1/4 inch of headspace at the top. Use a chopstick or canning tool to disperse the seeds and turmeric in the solution and remove any air bubbles. Wipe the rim and cover being sure not to spin the ring too tightly. Turn it just beyond the point at which it catches.


Lower the jar carefully into the boiling water and process for 15 minutes. Remove carefully with tongs, don't tip it or worry about the water on top, and set on the cloth to cool and seal.


For more info on canning, see my previous post on Pickled Beets with Cumin and Cloves and watch this great video!

Saturday, September 7, 2013

Pecan Walnut Chocolate Chip Cookies with Fleur de Sel

This recipe is from the amazing baking blog, Sally's Baking Addiction. In taste and texture, it's pretty much exactly like my Less Fussy Jacques Torres-esque Chocolate Chip Cookies. It has chew, fluff, goo, and crispiness.  It's scrumdiddilyumptuous!


I kept the recipe almost exactly the same as Sally's, except that I used salted butter. I pretty much always use salted butter in my baked goods because I really like the way a little extra salt makes my sweets pop (and I have a salt tooth, if that's a thing). 

I also added toasted nuts and topped each cookie with a tiny pinch of fleur de Sel, you know, so these would be snobby cookies. Just kidding! Any flaky sea salt will due or skip it. I really think this recipe benefits form the extra salt though.

The chilling in this recipe is absolutely essential (so don't get any funny ideas) as it helps the fats to solidify, making for a chewier, plumper cookie. Not chilling the dough will likely result in a very depressing, flat, spread out, greasy cookie, so I don't recommend it. Also essential, is the under-baking, which is pretty much the key to taking any cookie from good to phenomenal.

Sally has a long and interesting tutorial explaining this recipe. It's definitely worth a read if you want to delve deeper into the mechanics of all the steps. As per my usual method (See my Whole Wheat Cardamom Snickerdoodles and Less Fussy Jacques Torres-esque Chocolate Chip Cookies recipes), I rolled up all the dough into balls and froze them. In this case, I pre-chilled the bowl of dough for about an hour first because it was so soft from the melted butter. 


I love this method because I can take a few cookies out, pop them on a cookie sheet, and let 'em warm up while the oven preheats. Then, viola, yummy cookies ANY TIME!!! It also (sort of) keeps me from eating through an entire 20 some odd cookies in two days (ok, one day). It's a nice trick.

Chocolate Chip Cookies with Toasted Pecans, Walnuts and Fleur de Sel
Yield: 20-24 cookies if you use 2-3 Tablespoons of dough per cookie

Step One:
1/2 cup chopped pecans
1/2 cup chopped walnuts
Heat your oven to 350F and toast the chopped nuts for about 10 minutes until they're fragrant. Keep a  close eye on them, as nuts burn in an instant. Set aside to cool.


Step Two:
2 1/4 cups all-purpose flour
1 teaspoon baking soda
1 1/2 teaspoons cornstarch
1/2 teaspoon salt (I would increase this to 3/4 teaspoon in the future)
3/4 cup (1 1/2 sticks) salted butter, melted
3/4 cup light brown sugar, loosely packed
1/2 cup granulated sugar
1 large egg and 1 egg yolk
2 teaspoons vanilla extract
1 cup chocolate chips (I used mini semi-sweet chips)
1 cup chopped nuts (optional)
OPTIONAL: sea salt for sprinkling

Melt the butter in a small sauce pan on your stovetop. I usually heat it over a low flame until it's about half-melted, then I cut off the heat and let the residual warmth melt the rest. Once it's all melted, set it aside to cool slightly (we don't want it to cook the eggs!).


In a bowl, combine the flour, baking soda, cornstarch and salt. In a separate bowl, stir the melted butter and sugars together until smooth. Stir in the egg and egg yolk, then add the vanilla. Add the dry to the wet and stir to combine. Add the chocolate chips and nuts.  Cover the dough and chill for at least 2 hours, or up to 3 days in the fridge. Or use my freezer method (see above).


To bake, remove the chilled dough from the fridge or freezer and allow it to warm up a little, say for 15 minutes or so while you preheat your oven to 325F. Line your cookie sheets with parchment. Roll the dough into balls (use about 2-3 Tablespoons of dough per cookie) and set them a few inches apart of the baking sheets. Sprinkle with Fleur de Sel or any flakey sea salt and bake the cookies for 12 minutes. 

The cookies should look slightly browned around the edges but under-baked in the centers. Remove them from the oven at this point and allow them to cool on the sheet for a few minutes. Then move them to a wire rack to finish cooling. 

Enjoy with cold milk!