Wednesday, March 27, 2013

Herbed Caramelized Tomato Whole Wheat Couscous

For this dish, I slightly adapted a recipe for Roasted Herbed Tomatoes from the fantastic  website, Tasting Table. Roasting the tomatoes brings out their sweetness, which is imperative in winter, when there's nary a delicious tomato to be had.

I prepared an entire box of Hodgson Mill Whole Wheat Couscous per the box instructions, then tossed in the vinaigrette and roasted herbed tomatoes, fluffing and combining everything gently with a fork. Along with a salad, this makes for a wonderful light lunch or dinner. Deeeeee-licious!


Couscous
Hodgeson Mill, or other couscous variety, prepared per the box instructions

Lemony Basil Vinaigrette
1 Tablespoon olive oil
juice of one lemon
1/2 teaspoon sea salt (plus more to taste)
50 turns freshly cracked black pepper
handful of basil leaves, roughly chopped

Herbed Roasted Grape Tomatoes
Adapted from Tasting Table, Roasted Herbed Tomatoes
1/2 teaspoon dried basil
1/2 teaspoon dried oregano
1/2 teaspoon sea salt
1/2 teaspoon freshly cracked black pepper
about a Tablespoon olive oil to coat
one container (about a pint) grape tomatoes, halved

Preheat your oven to 375°F. 

Wash the grape tomatoes and dry them off as well as possible. Toss them in a bowl with the dried basil, oregano, salt, pepper and oil so they're evenly coated.

Lightly grease a baking sheet (or line one with silt-pat or parchment) and place the tomatoes on it, cut side up. Roast for about 20-30 minutes until the tomatoes are tender and slightly shriveled. Toss the roasted tomatoes into the couscous along with the vinaigrette, season to taste, and enjoy!


Monday, March 18, 2013

Rosemary and Bittersweet Chocolate Olive Oil Cake

I found this recipe idea while scanning the web for a not-too-sweet dessert to bring to a dinner party with my new blogger friend, Samar. Samar is the author of the wonderful culinary mash-up blog, Oishii Rasoi. We share a similar obsession with the entire panorama of Asian cuisine, as well as, a penchant for challenging ourselves to replicate complicated techniques (or at least seemingly complicated techniques) in our tiny New York City kitchens. 

Here's what I brought...


This cake is wonderful. I mean WONDERFUL! It's FULL of flavor and the texture is divine. There's a hint of savoriness from the rosemary, bitter-sweetness from the dark chocolate, and it's all cushioned in a light, fluffy cake with a perfectly crisp outer shell. 


Rosemary and Bittersweet Chocolate Olive Oil Cake 
Adapted from 101 Cookbooks who adapted it from Good to the Grain, by Kim Boyce
(Two eight inch cake pans = two thin, lovely cakes but you can also make this as a loaf and just increase the baking time)
Dry:
3/4 cup spelt flour
1 1/2 cups all-purpose flour
1/2 cup granulated sugar 
1 1/2 teaspoons baking powder
3/4 teaspoon sea salt

Wet:
3 organic eggs
1 cup extra virgin olive oil
3/4 cup 2% milk (whatever fat content you have is fine)
1 1/2 Tablespoons fresh rosemary, roughly chopped

5 ounces bittersweet or dark chocolate (70% cocoa or higher), roughly chopped 
*Per 101 Cookbooks author, Heidi Swanson, leave some large chunks 1/2 inch or so, for texture variation!

1 Tablespoon sucanat or sugar in the raw sprinkled on the top for more texture!

Preheat your oven to 350°F.

Grease your cake pans with olive oil then line the bottoms with parchment rounds and lightly grease those with olive oil too.

Prep the Rosemary and chocolate and set aside.


Combine the dry ingredients well and set them aside.

In a separate bowl, whisk together the eggs, olive oil, milk and rosemary.


Fold the wet ingredients into the dry, mixing until they're just combined. Add the chocolate chunks to the batter then pour it into your prepared pans. Sprinkle with sucanat or sugar in the raw.


Bake for about 13-15 minutes, until golden and a toothpick inserted into the center comes out with just a speck of crumb. 

This cake is absolutely delicious both warm and at room temperature.


Friday, March 15, 2013

German Apple Pancake Pie for National PI day! (belated)

I know it's a little bit of a stretch, but yesterday I decided to make German Apple Pancake "Pie" for National PI day. 


I'm often late to the game on things, so when everybody started yappin' about National Pie day I was like, whaaaaa? I looked up National Food Holidays in an effort to avoid being side-swiped by yet another national day of food celebration and discovered it was actually PI day. Go figure...literally! Hahahahaha.

Side-swiped may seem like a strong term for being simply caught off guard by a mere food holiday, but as a food blogger left scrambling to come up with a pie to honor this day, I was flummoxed. Flummoxed, I say! It turns out that yesterday was also National Potato Chip day, so to continue with the histrionics, how about this? "Dude, I totally got round house kicked on national potato chip day! I ate like ten bags of Lays Sriracha ...youch!" 

Ok, I'll stop.

Anywho, here's my adaptation of the German Apple Pancake from The America's Test Kitchen Family Baking Book. It's especially fabulous served along with some bacon (what isn't?) and is one of the few things I make fairly regularly because it's one of my husband's favorites. 

The first time I made it for him he looked up from his fork and with a distrustful sideways glare and said, "Tell me you wrote this recipe down!"  He asked this of me distrustfully because until I started my blog, I rarely recorded my recipes and so I couldn't always exactly duplicate them. In most cases, that was fine but the hubby was nearly hysterical at the thought of never having exactly the same German Apple Pancake experience (another awesome band name!) again. All that said, this is actually a variation from that first time but it's still amazing, warm, comforting and decadent. And now, it's recoded for posterity. You're welcome, hubster.

German Apple Pancake PI
Adapted from The America's Test Kitchen Family Baking Book, German Apple Pancake 
1/2 cup all purpose flour
1 Tablespoon granulated sugar
1/2 teaspoon salt
2/3 cup half and half (or milk) *I actually used hazelnut milk and it was very good but I think a richer milk would have benefited the dish.
2 large organic eggs
1 teaspoon vanilla extract
2 Tablespoons salted butter
3.14 sweet apples, cored and sliced about 1/4 inch thick *I used 4 apples but probably ate enough while I was cooking that it ended up at 3.14. Just fill the pan with apple slices so it's pretty crowded but not overflowing and you're good to go!
1/4 cup sucanat or brown sugar *sucanat is just less refined, granulated brown sugar
1 teaspoon cinnamon
dash nutmeg
dash ground cloves
1 teaspoon lemon juice
confectioner's sugar for decorating
*PI stencil, optional!

Preheat your over to 500F.

Wash, core and slice the apples. Set aside.


My attempt at 3.14 apples! I'm not good at math.


Combine the four, granulated sugar and salt well. Set aside. 

In a separate bowl, combine the half and half, eggs and vanilla with a whisk. Mix the wet into the dry and whisk until the lumps are gone. 


In NYC extra counter space=empty sink! 


In an oven safe 10 inch pan, add the butter, sucanat and a pinch of salt and heat on medium until melted and gooey. Add the apples and spices and saute for about ten minutes on medium/low heat until the slices are tender-firm and well coated. Snack of delicious, hot, buttery, spiced apple slices to divert yourself! 


Cut off the heat and squeeze the lemon juice over the apples. Top with the batter starting at the outer edge of the pan and working inward in a circular motion (you're just looking for even dispersion here).

Note: As you can see, I didn't get all my lumps out of my batter but it still tasted great. If I'd been making this for company, however, I would have passed the batter through a sieve.  


Place the pan into the hot oven and reduce the heat to 425F. Bake for 18 minutes until puffed, golden and set.


Decorate with confectioner's sugar (or not) and enjoy!


Thursday, March 14, 2013

Irish Soda Quick-Bread (Gluten Free)

Lá Fhéile Pádraig (almost), everybody!

This gluten-free rice flour quick-bread is light, sweet, moist and cake-like in texture. While there is no soda used for leavening in this recipe, it's still "Irish Soda" inspired because it's flavored with caraway and currents, which are common Irish Soda bread ingredients.

I created this recipe very early in the morning while jamming out to the Irish Traditional station on Pandora Radio. If I'd been scheming, I would have made it in the afternoon and had a Guinness (or two!) whilst I toiled, but alas, I was not scheming. Learn from my mistakes!


This recipe is vegetarian (if you do eggs/butter) and gluten free. It uses the gluten free rice flour blend I blogged about previously with my Smokey Mocha Tarts. The resulting bread is really scrumptious, especially on the same day it's baked after it has fully cooled. It's also good the next morning but any further out than that didn't thrill me texture-wise.

The cake is also quite sweet, so I'd suggest reducing the sugar by up to half if you prefer things on the less-sweet side. If you enjoy a slice along with a steaming cup of black coffee, however, it's pretty much magic. Pot of gold at the end of a rainbow, magic? Yep, that kind of magic!...sorry, I had to.


Gluten Free "Irish Soda" Quick-Bread
(makes one 9 inch loaf / OR 24 mini muffins/ OR one small loaf and 12 mini muffins)
1 1/2 cups gluten free flour blend
1/2 cup (8 Tablespoons/1 stick) salted butter
1/2 cup sugar (or less)
1 teaspoon lemon extract (or 1 Tablespoon lemon juice)
1/2 teaspoon vanilla
2 eggs
1/2 cup almond milk (any milk you have will do)
1 1/2 Tablespoons caraway seeds
1/2 cup currants

Preheat your oven to 350°F.

Prepare a loaf pan by lining it with foil and greasing it well. If you're using a mini muffin tin, grease the tin well with vegetable oil. 

Using an electric mixer on medium speed, cream the wet ingredients together in a large bowl. Add the gluten free flour blend and beat until combined. 


Transfer the batter to your prepared tin(s) and bake for about 38 minutes for a loaf (until it's golden and a toothpick comes out with a few crumbs) or 18 minutes for mini muffins.

NOTE: The swirls I created on the top of the loaf pretty much maintained their integrity during baking, so pay a little attention to the design before baking so your loaf comes out looking snazzy. Dang, it just occurred to me that I should have tried drawing a shamrock on it. If you try that and it works, pleeeease let me know!

Éirinn go Brách!


Monday, March 11, 2013

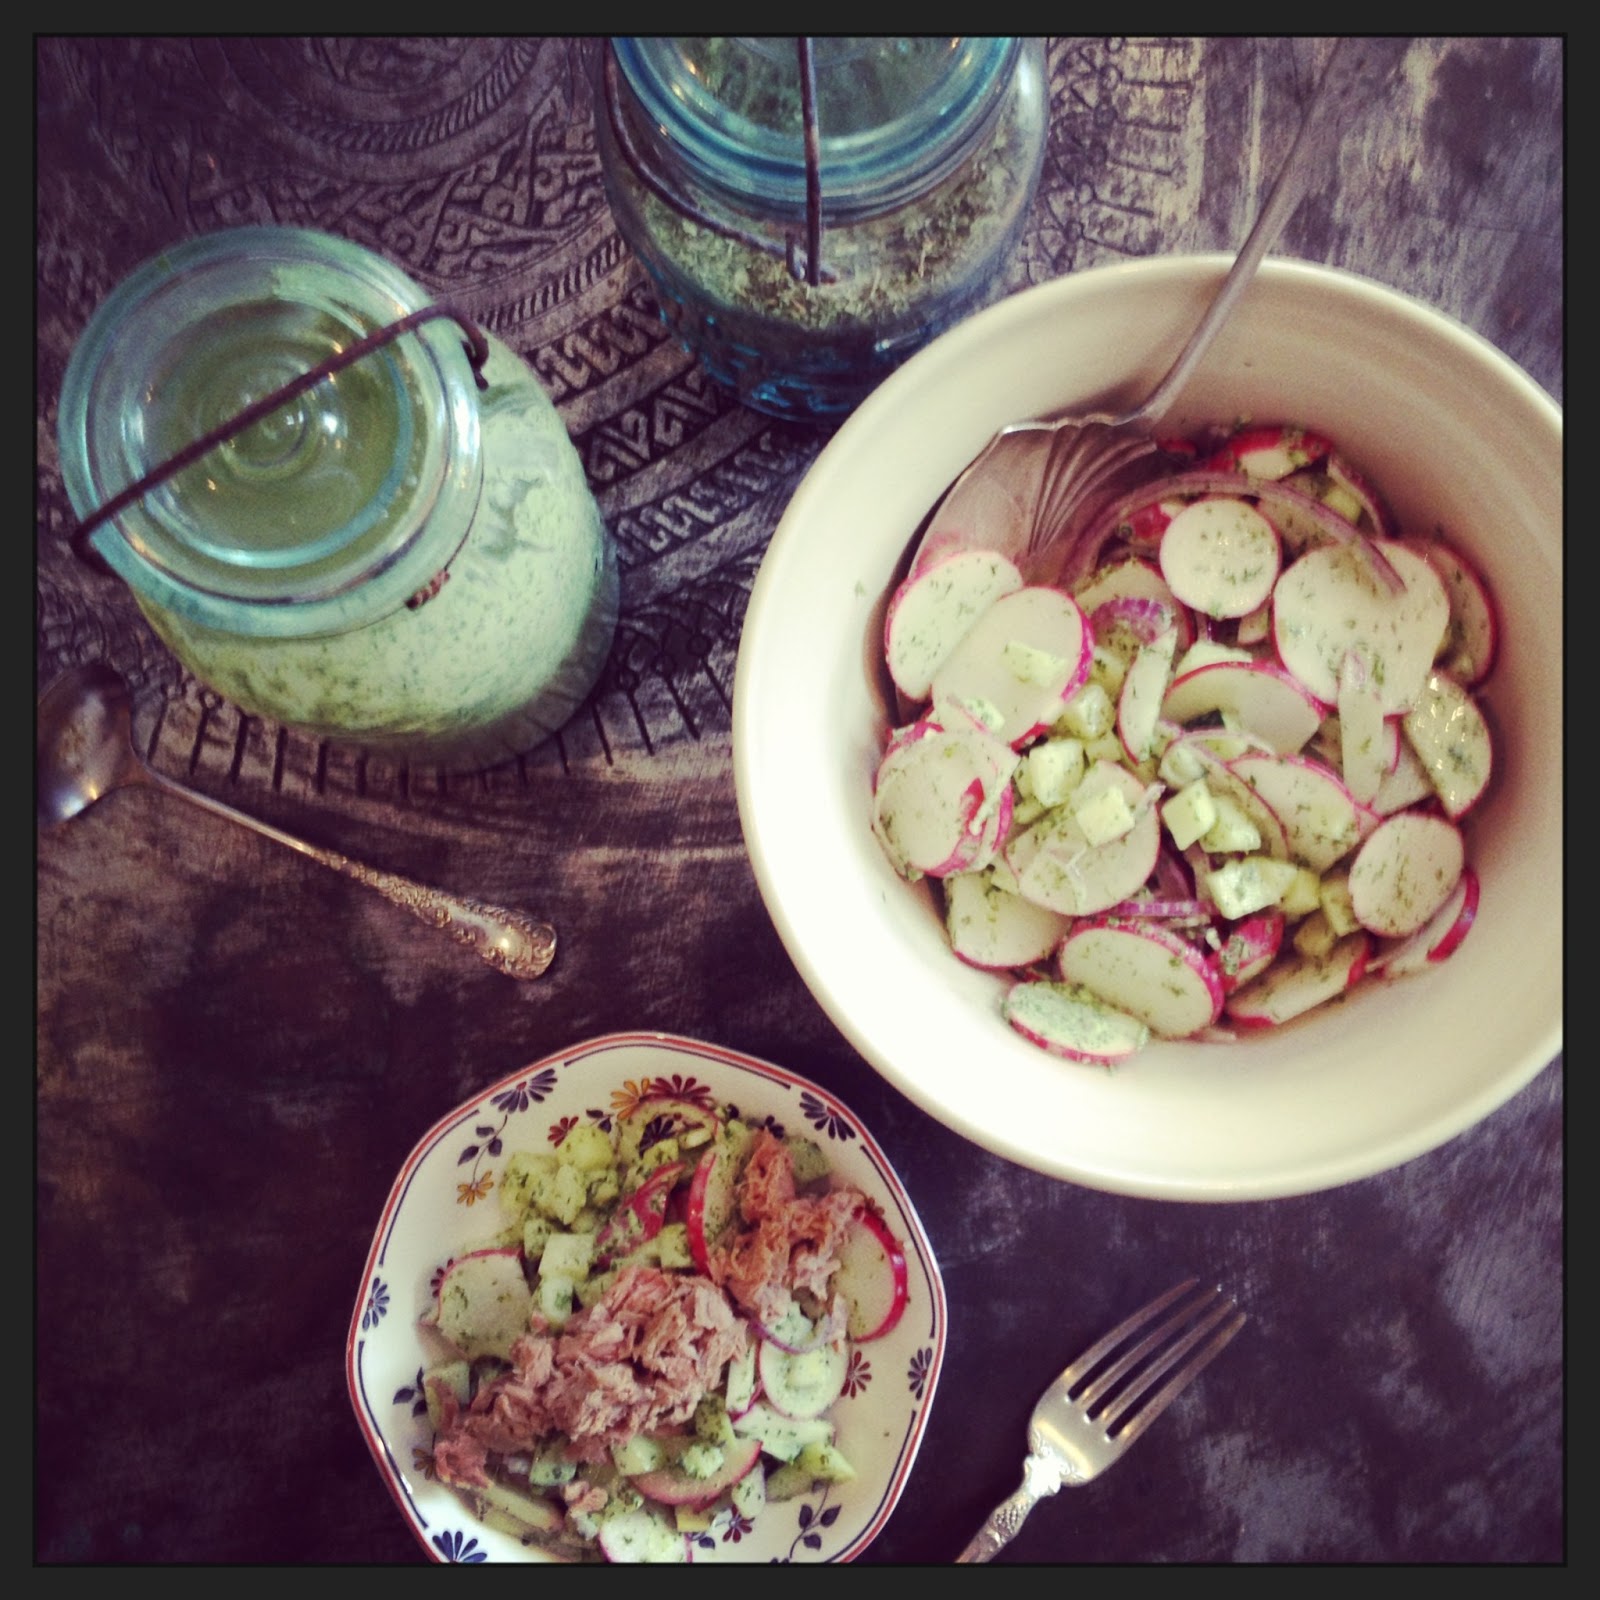
Dill Tzatziki Dressing

This recipe is my personal retribution (a yummy one, but still) for all the cakes and tarts I've been making lately. It's a spin on tzatziki, the Greek cucumber dip. It's light, fresh and delicious over a hearty chopped salad with chunks of cucumber, radish, onion, perfectly hard boiled eggs and canned salmon.


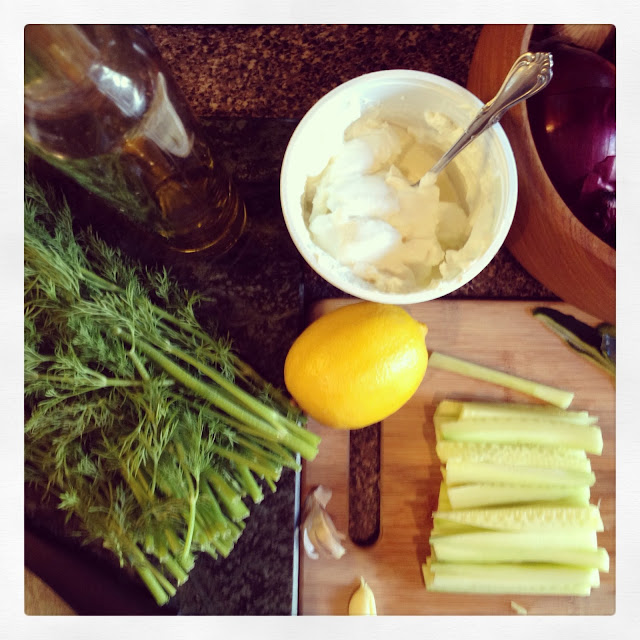
Dill Tzatziki Dressing
1 clove garlic, roughly chopped
1/4 cup olive oil
juice on 1/2 large lemon
1 1/2 cups greek yogurt or other plain yogurt
1 Tablespoon dried mint, crumbled (or 2 Tablespoons fresh mint, chopped)
1/2 teaspoon sea salt (to taste)
1/2 teaspoon freshly ground pepper
1/2 teaspoon siriacha or other hot sauce (optional)
3 cups (approx.) fresh dill, roughly chopped


Add all of the liquid to your food processor along with the garlic and blend well. Add the chopped dill and process until it's finely chopped and well incorporated into the dressing.

Serve over cucumber salad (mine had cucumbers, red onion and radishes) along with some canned salmon or tuna for a light, healthy meal akin to a salad niçoise. 


Wednesday, February 27, 2013

Candied Grapefruit Upside-Down Cake (i.e. My Birthday Cake!)


You say it's your birthday? Da da da da da daaaa da
It's my birthday too, yeah! Da da da da da daaaa da
You say it's your birthday? Da da da da da daaaa da
I'm gonna make a Candied Upside-Down Grapefruit Cake, yeah?


Thanks for humoring me on that! 

So you may have guessed that today is my birthday! I'll tell you, the last 34 years have been more amazing, heartbreaking and breathtaking than I could have ever imagined. I have learned so much and even though I've experienced a great deal of loss, I'm just sitting here this morning feeling so grateful for my hard won wisdom and my ever expanding heart (I know I'm giving myself a lot of credit here but I'm allowed to on my b-day, right?!;-).

At 34 big ones, though I still don't know exactly what my path will be, I can say that my credo is finally clear. I know what kind of person I want to be, how I wish to be remembered, and that my good fortune will be a direct result of hard-work and intentionality. Emily Dickinson said it best...


“Luck is not chance-
It’s Toil-
Fortune’s expensive smile
Is earned-”
– Emily Dickinson


That said, this cake is a tribute. It sums up the trials, tribulations and triumphs of 34 years of life; It's bitter, it's sweet, and it's delicious. 

The grapefruit is candied so the rind is made somewhat more mild though it still maintains it's bitter edge. If you like that bitter kind of sweetness, you'll love this recipe.


Candied Grapefruit

2 cups water
1 cup sugar
1 large red grapefruit, sliced into thin rounds

In a wide pot, bring the sugar and water to a simmer, stirring until the sugar has dissolved. When the liquid is clear and simmering steadily, add the grapefruit slices and simmer for about 40-50 minutes until the rinds are fairly translucent. While it's simmering coat a 9-by 2-inch round cake pan with vegetable oil and line the bottom with parchment, also coating that lightly with oil.


Once the slices are ready, use a slotted spoon or spatula to carefully transfer them to the prepared cake pan and arrange them in a decorative pattern.


Preheat your oven to 350°F with the rack in middle. 


Candied Grapefruit Upside-Down Cake

1 1/2 cups all-purpose flour
1 1/2 teaspoons baking powder
1 teaspoon baking soda
1/4 teaspoon sea salt
1 stick salted butter, softened (or 1 stick unsalted butter and 1/2 teaspoon sea salt)
3/4 cup sugar
2 large eggs
zest of one entire grapefruit
2 Tablespoons grapefruit juice
3/4 cup buttermilk (cultured or rehydrated from a packet)

Whisk together the flour, baking powder, baking soda and salt.


In a separate bowl, cream the butter and sugar on high until light and fluffy. Add the eggs one at a time, beating well after each addition to incorporate. Mix in the zest and grapefruit juice.


Using a spatula, fold the dry ingredients into the wet in a few additions, alternating with the buttermilk, until just incorporated. Pour the batter into the cake pan being careful not to upset your design. Spread the batter out evenly.


Bake the cake for about 40 minutes it is until deep gold and a toothpick inserted into the center comes out with just a few crumbs (check at 30 minutes). 


Cool the cake in the pan for about 15 minutes, then place your serving platter on top of the cake pan and invert the whole shebang so the cake releases onto the platter. Serve right away, at room temperature, or chilled. It's great with a little fresh whipped cream to counter the bite of the citrus.


Monday, February 25, 2013

Glass Noodle Stir Fry

Sweet potato cellophane noodles (dangmyeon), also know as glass noodles, are a Korean staple. They're gluten free and have a satisfying springy texture and mild flavor. They are generally used in a traditional vegetable and beef stir-fry called chapchae. This, like all my recipes, is a variation on a theme so please feel free to add any vegetables you like (and have available). Substitute wakame (seaweed) and miso paste for the fish sauce if you prefer to make this vegan. Either way, it's delicious!


Glass Noodle Stir Fry
1 large bunch bok choy, washed and chopped
1 handful cilantro leaves, roughly chopped
4 radishes, thinly sliced
1 cup or so sugar snap peas or snow peas, ends removed
1/2 lb button mushrooms, thinly sliced
4 green onions, sliced into thin rings (plus more for garnish)
1 cup lotus root, thinly sliced (optional)
3 carrots, thinly sliced
*1/2 lb sweet potato cellophane noodles, boil them for 4 minutes until al dente

Sauce
3 cloves garlic, minced
1 small green chile, minced
1 1/2 Tablespoons black sesame oil
4 Tablespoons soy sauce (plus more to taste)
2 Tablespoons gochujang (fermented red chili sauce) or other chili sauce for heat
1 Tablespoon fish sauce (or miso and wakame)
1 Tablespoon oyster sauce (optional)
1/4 cup cooking liquid from the noodles

Set the water for the noodles on the stovetop to boil. 

While it's heating, chop all the vegetables and set them aside. 

Prepare the sauce and set it aside. 

Begin boiling the noodles. While they're cooking, heat a large pan or wok over medium/high heat and add all of the sauce including about 1/4 cup of the hot water from the noodle pot. Once it bubbles, add all the vegetables and toss until everything is coated. Cover for a minute so the vegetables can soften and wilt. Remove the cover and pull all the vegetables to one side, tipping the pan so the sauce pools in one corner. 

Take tongues and pull the noodles out of the water placing them in the bubbling sauce pool (you can also just quickly drain the noodles and then toss them into the bubbling sauce). Saute them in the sauce for about minute so they can absorb the flavors. Toss the noodles in with the veggies and taste for seasoning. Serve hot!